Saturday, 17 March 2012

Say hello to Henry!

A very good day dear ladies! The sun is shining on my patch of Yorkshire and it feels like spring is finally here!

It has been a while since I posted but I'm here today to share with you a fantastic visit I made to Yorkshire Sculpture Park a couple of weeks ago.

Although it is always a great place to visit I wanted to go for a very specific reason - to see an exhibition of Donna Wilson's woolly creatures! And I wasn't disappointed! Donna makes the most incredibly off beat knitted creatures, but also a wonderful range of Nordic inspired blankets and cushions.


I really love her work and especially as she uses British yarns and recruits the awesome talents of knitters from the Scottish Islands and Highlands - traditional craft areas that struggle with unemployment.


I fell in love with a little chap named Henry. He has been hand knitted in pure wool in the Shetlands and takes his character from traditional Icelandic patterns. And now he is mine!!!

Say hello to Henry!


It is rare for me to splash out like this but Henry is useful, hand crafted using pure wool, has provided employment for traditional craftspeople and is beautiful!!!!!

I was inspired to make a complimentary cushion using Fair Isle patterns and have done about half so far. ...


I'm really enjoying this 'free form' style of knitting. I am not following one pattern....I am following a variety of patterns and mixing and matching as I go along. There is no planning so I hope it all comes together ok! I will let you know. The yarn I am using is a favourite of mine from an historic mill in Lanarkshire, Southern Scotland. It is beautifully rustic, pure new wool with a great range of natural looking colours. Perfect for this sort of project.

For those who haven't been to http://www.ysp.co.uk/, do try to visit if you can. It really is a marvellous day out - lots to see, child friendly, great for picnics and beautiful strolls. You may also meet some interesting characters!


Enjoy your weekend! xxxxxx

Monday, 16 January 2012

Check this out

I just had to share this Sudafed ad with you, which uses......crochet. Wonderful. I wonder who did the crochet?


Sunday, 15 January 2012

Dolly daydreams

Hello dear ladies! I hope you are enjoying your weekend. We are having a really cold spell here in Yorkshire and I awoke this morning to a very thick frost covering the whole garden. Magical.


Thank you so much for your lovely comments about the pooches. I do hope some of you decide to make them. With some help, it is a good project for children.

I wish I could do this!!!


It is my great niece Jemimah's first birthday soon (where does the time go????) and I thought about what to make her. She's had lots of blankets and my sister made her a quilt....then it came to me. A doll! So then I started looking online for cloth dolls and found an absolute treasure trove of  dolls ranging from exquisite to, frankly, creepy.


Children have played with dolls since ancient times. Dolls found in ancient Greek and Egyptian tombs are very crude affairs, made from wood, and sometimes clay or even bone and ivory. However, it seems that the cloth doll or rag doll has always existed. Due to it's fragile nature there aren't many examples but some have survived. This Roman doll is over 2000 years old and now lives in the British Museum! I'm sure it was more attractive when new!


So long before dolls were made commercially, enterprising parents or older siblings would craft soft dolls for the infant members of the family, invariably from scraps of cloth left over from dress making, or reusing worn out items of clothing. Even sackcloth was used.

Here are some early examples of cloth dolls...
Beautiful African American twin dolls from the late 1800s (courtesy of Hatch Collection)


An entirely hand made American doll from around 1890-1900

A Russian doll from the early 1900s


A French cloth doll from around 1920s
I do love these old dolls but I have been completely bowled over by the masses of amazing dolls being made now. I couldn't possibly post on all of the gorgeous dolls I have found so here is a little taster...

Firstly, there is a whole world of stunning, artist created dolls that are definitely not toys but are works of art to be treasured. This one is a Frida Khalo doll by artist Cyra R Cancel. I LOVE it!


This beautiful girl is called Raggedy Red and is by Black-Eyed Suzie whose blog can be found here...


The very pretty Madeline has been made by Tessa whose blog is here


And I adore little Lucy made by Jen at the Fabled Needle.


The following dolls are more child-friendly but are no less beautiful. 


These cuties are from Dolly Donations and a free pattern can be found here! There is so much generosity online!


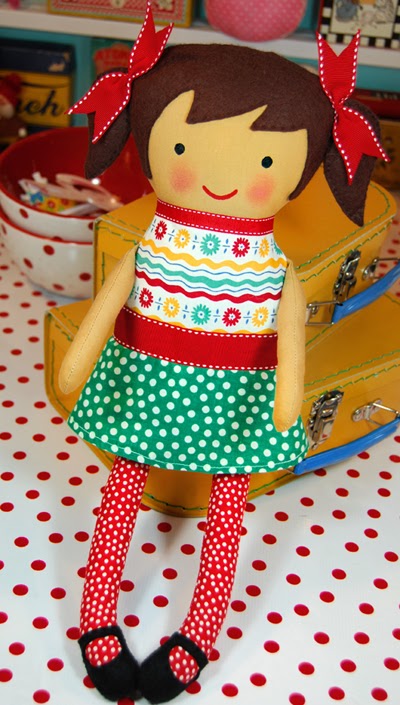
This very colourful doll is by Jenny B Harris at Allsorts.....I love the fabric!


Another free pattern here for these gorgeous Lucy Dolls by Wendi Gratz....


These are made from a free pattern from Emily Martin and have inspired so many beautiful variations. Just google Black Apple doll and you will see!


Now we have Rosie, who is a more traditional rag doll - with yarn hair. A free pattern can be found here . I do love the yarn hair but I think for babies and very young children who will probably chew/suck it, it is probably not a good idea.


Seriously, there are just so many truly gorgeous dolls around. I am so inspired! I have a stash of vintage fabrics and also some Amy Butler. All I need now is the body fabric, although some doll makers recommend using a white pillowcase (if you want a white doll). I suppose at one time they really were rag dolls and were made from whatever scraps of fabric were around.

I will post on my dolly progress! Have a good week xxx


Tuesday, 10 January 2012

Good to be back

Hello my dear ladies!

It is a new year and I haven't post for some time. Lots of things have been going on including illness in the family. So I am glad to be back and I am so sorry for not keeping up with your lovely blogs.

I hope you all had a wonderful Christmas or Hanukkah (or both!) and that you are feeling positive and enthusiastic about the coming year.

I really haven't done much in the way of making things but I did manage to put together a couple of little toys for Christmas gifts - one for Secret Santa at work and another for my lovely sister.


I did find it quite hard to part with them but both little beasties are now being well loved in their new homes :)


They are terribly easy to make. I got the pattern from the very generous Jenny who is sharing it for free  here

I think they would look good in all kinds of fabrics (remembering to add a seam allowance if you use a fabric that needs a hem).

So this was just a quickly to say hi and sorry and I have missed my bloggy friends! Apples and Pears is now open for business again! xxx

Saturday, 19 November 2011

Sweet treats

Good morning dear ladies! I hope you are enjoying your weekend.

Thanks for your comments to my last post - I hope that some of you try the recipes.

As many of you will know, it was Children in Need yesterday and at work we always have a huge auction to raise funds. I donated some genealogy research and I made up my regular boxes of treats as they always raise quite a bit of money. I first saw these a couple of years ago on the Heal's site and was amazed at how expensive they were. I knew I could make them much cheaper so I thought I would share this idea for really pretty sweet boxes (in time for Christmas!.

Take one or several clear plastic bead boxes - any size but they must be clear (you'll see why). Add a selection of colourful, old fashioned sweets - cherry lips, love hearts, licorice allsorts, jelly beans etc etc. Fill up the compartments and close. And you have this.....


How pretty are these? You can also employ a child to help you make them - I'm sure there would be no shortage of vounteers!!

You can replace some of the sweets with little gifts like hair bobbles or little cars. Or if you want a more grown up version you can use fancy chocolates, sweets in foil wrappers, sugared almonds and dragees (silver almonds). 

The boxes are available from craft shops or online.

Enjoy your weekend! xxxx

Tuesday, 15 November 2011

Alchemy #2

Hello dear ladies!


Now we come to exciting bit of green cleaning - the alchemy. I am going to give you some recipes for making your own cleaning products. As I said in a previous post I began making my own cleaning products because my boy has both eczema and asthma. Also, did you know that there are around 80,000 chemicals in use in homes and businesses and the average western woman is exposed to over 500 of them each day before she leaves the house! Chemicals such as benzene, hypochlorite, scilica and butyl are found in a wide range of cleaning products and are linked to all sorts of health problems - infertility, hormone disruption, skin and lung problems, and even cancer. In fact we don't really know what the long term effects on our health will be.

So the reasons for making cleaning products are pretty clear in terms of reducing your chemical exposure. It is also much better for the environment (bleach kills seahorses, ladies) and is cheaper too!

So here is your shopping list for the essentials that will clean everything from toilets to fridges to your precious wooden furniture.......

1. White distilled vinegar - the queen of green clean!

2. Bicarbonate of soda (I think that is baking soda in the US)


3. Borax or borax substitute

4. Essential oils - lavender and tea tree are naturally anti-bacterial; I also use lemon and sweet orange, again anti-bacterial but they also smell gorgeous.


5. Liquid castille soap


You can also add fresh lemons, 6% hydrochloric acid (a natural bleach and really good for cleaning bathroom grout!), plain old table salt and soda crystals to your list  if you wish. I tend to buy bulk order of bicarb and borax online as those titchy little tubs won't go very far! I buy the rest from local supermarkets or stores.

A word of caution here - just because a product is natural doesn't mean it is harmless. Borax especially is harmful if ingested or is in contact with the skin so please, please keep your cleaning kit out of the reach of children and pets!

Recipe #1 - general purpose cream cleanser

You will need:

A small shallow container with a lid
Bicarbonate of soda
Liquid castille soap (or environmentally friendly washing up liquid, such as Ecover)
Essential oils
Vegetable glycerin (to stop the cream from drying out)

1. Mix about 6-8 tablespoons of bicarb in your container with about 1 teaspoon of liquid soap. It should easily form a sort of paste. You don't need to be too precise about measurements - you want something that is the consistency of cream cheese so add more soap or bicarb as you need.

2. Add about 10 drops of your favourite essential oil. Tea tree is good for bathrooms, as is lavender - or you can mix them. Lemon and sweet orange are really nice for kitchens.

3. Add a teaspoon of vegetable glycerin if you plan on keeping the cleanser for more than one use. This prevents it from going hard. You can buy it from the chemist.

4. Mix it all together and apply to surfaces with a damp sponge and then rinse. It is very gentle and won't scratch and yet it cleans very well. Don't expect it to be like a shop bought cream cleanser - it won't be that smooth or fluid - but it is easy and very pleasant to use.

I use this for cleaning the kitchen surfaces, sink and taps, bathroom, doors and window sills. Once you have rinsed you can buff taps and sinks up to a spectacular shine with a soft, dry cloth.


Recipe #2 - wood cleaner

This is one of my favourite recipes. Unlike spray polish that just adds a layer of gunk to your furniture, it produces the most wonderful, deep lustre in natural wood and you will be amazed at the amount of dirt it shifts too. You will smell vinegar at first but please don't worry, it dissipates very quickly and you are left with the gorgeous smell of the essential oils.

You will need:

A small mixing bowl

1 tablespoon of olive oil

2 tablespoons of white vinegar (it really must be white distilled vinegar- this is what lifts the dirt)

A small splash of liquid soap or 'green' washing up liquid

About 8 or 10 drops of essential oil - choose whatever appeals to you. I prefer lavender.

1. Mix the ingredients in the bowl and then add tepid water to double the amount of the mixture. Mix it together and apply to the wooden surface with a soft sponge of cloth. Do this sparingly, squeezing out well before applying so as not to make the wood wet.

2. Once it is dry, buff with a soft cloth. Throw away any remaining.

As I say, the smell of vinegar will be strong only for a very short time! I would recommend you do this about twice a month.

For in between care of wooden furniture I just use a barely damp micro fibre cloth. I have a spray bottle with a few drops of essential oil and water and use this for normal dusting, squirting it sparingly on surfaces. This leaves a lovely scent.

Recipe #3 Toilet bowl cleaner

1. At night throw a cup full of bicarb down the loo and add a cup of white vinegar. It will fizz. Leave it to work over night. You can use a brush if you wish.

2. Alternatively, sprinkle borax into loo (but remember that this can cause serious skin and eye irritation so take care when using).

Once I have cleaned the toilet, I spritz it with a mixture of tea tree oil and water mixed in a spray bottle. This gives a nice scent but is also a powerful anti-bacterial. In fact, you can mix this up in a small spray bottle and use it on public toilet seats when travelling!

 
If you decide to give these a go I would love to hear how you get on. Or perhaps you have some alchemy you can share! I will post more recipes soon but I think these will give you a starter.


Enjoy your week! xxx